
This post is way late, seeing as I put together this costume back in July for San Diego Comic Con, but better late than never, eh? I’m a baby cosplayer. I’ve been doing costumes for years, but mostly for renaissance faires. But I’ve always wanted to cosplay at a convention, so for SDCC this year, I finally got off my lazy butt and put together a seat of my pants Black Widow cosplay that actually turned out pretty well. I’m pleased with it, anyway, and that’s what really matters, right? ;) Instead of hunting down a jumpsuit to do the usual Widow costume, I decided to go with this one:

Clint, you idiot. From Hawkeye #9, featuring the ladies in Hawkeye’s messed-up love life. Art by David Aja, words by Matt Fraction.
Obviously a black minidress, boots, fishnets, and a wig would be much easier than her catsuit costume, and since this was literally at the last minute, easy is what I was going for. And here’s the finished product:
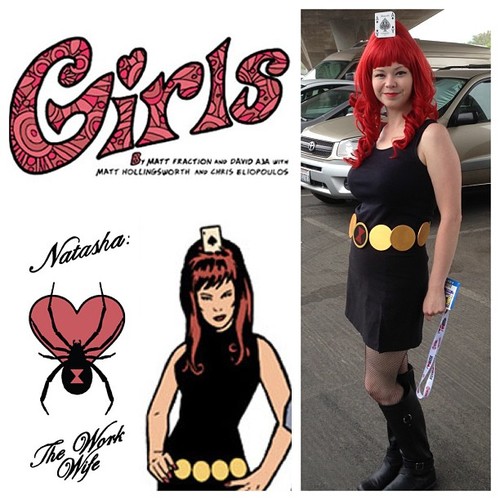
Yours truly as The Work Wife
The Clothes
On such short notice, I couldn’t find a high-necked minidress, and with my craptastic sewing skills, I certainly couldn’t make one. I ended up going with a Goodwill miniskirt find and a black tank top, since apparently sleeveless mock turtlenecks went out of style in the sixties. Put together and with the belt over the waist, this worked pretty well as a last minute mod minidress.
The fishnet tights are the easiest bit, and I already had a pair of knee-high riding boots that subbed well enough to Natasha’s go-go boots (and let’s be real, there’s no way I’m walking around SDCC in heels).
The Hair
I already had the base wig, so the real challenge was figuring out how to do the teased style and get that card to stand upright. The base wig is Hestia in Apple Red from Epic Cosplay:
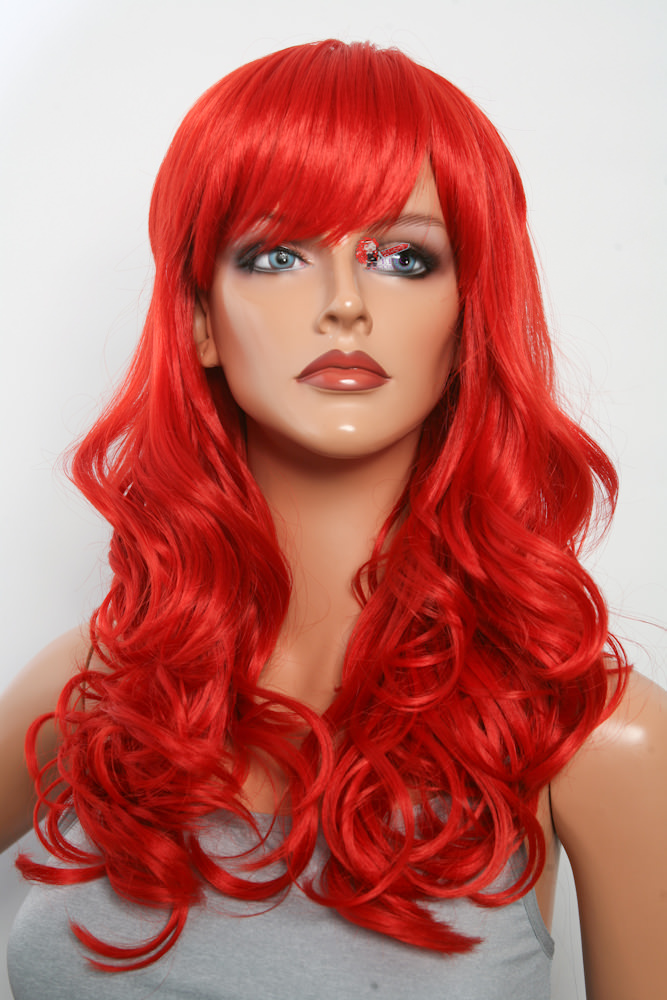
Hestia wig from Epic Cosplay
As you can see, this wig is pretty long and has nice, loose curls, and conveniently, all of Epic Cosplay’s wigs are made of a synthetic material that is heat styleable, so you can straighten or curl Hestia to your heart’s content. The apple red color is very bright and cartoonish, so it works well for a comic book Natasha cosplay.
For the teased part, I bought a 20″ ponytail clip-on, also in apple red.
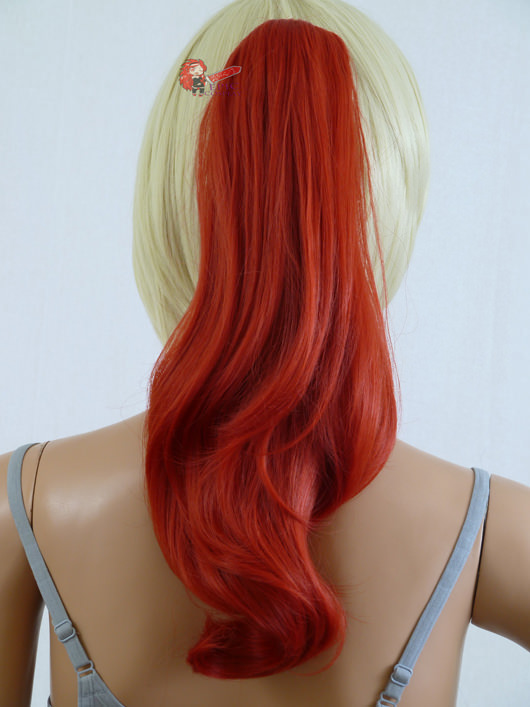
20 inch clip-on extension from Epic Cosplay
Basically, the clip on is a big hunk of hair attached to a claw clip, so you can simply clip it into either your hair or a wig. I clipped it at the very crown of my head, and the ponytail falls perfectly into place. No need for teasing, and you can adjust the curls to match into the Hestia wig perfectly.
The playing card caused me some grief. I ended up taping bobby pins to the back of the card, a couple at the bottom to attach it at the front of the ponytail clip and one in the center-top of the card that helped keep up upright. Next time I do this costume, I’ll experiment more with better ways to handle the card, since I had to keep adjusting it during the day to keep it in place.
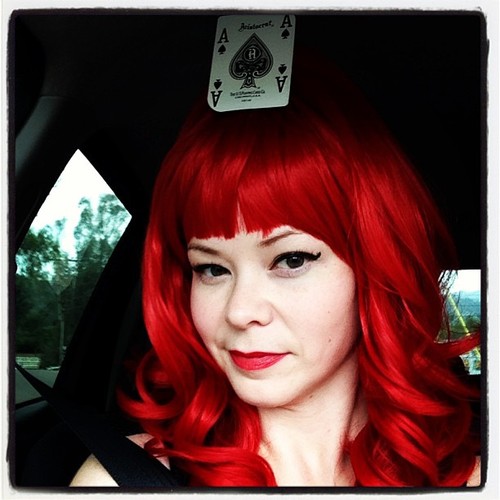
The finished Work Wife hair.
The Makeup
This was easy enough. I used my usual foundation and a powder to set it, and I penciled my eyebrows a bit so they would stand out against the vivid color of the wig. I used a champagne eyeshadow to get a little bit of shimmer and definition, and I did the heavy cat-eye liner using stila Stay All Day Waterproof Liquid Eye Liner in Intense Black

For lips, I used L’Oreal’s Colour Riche Lipcolour in True Red, which is nice and vibrant and doesn’t go pink on my lips. I paired this with a red liner to help the color stay around. I’d recommend using your favorite shade of red lipstick, though, because reds can be finicky based on your skintone and overall coloring.
The Belt
The belt was by far the most time-intensive part of this costume, and I’m still fiddling with it for future use.

The materials!
3 inch diameter wooden circles make up the bulk of the belt design. I used a fine sandpaper to smooth out the edges.

Primed.
Before adding the colors to the belt, I primed all of the wood circles white. Regular craft paint works fine for this step. Once the primer had dried, I painted on several coats of a metallic gold craft paint.

Painted gold.
This is where my advice will deviate from what I actually did. For the center belt piece (which differs from the Work Wife outfit in that I made it look like her typical catsuit belt buckle), I painted a black circle in the center (created by tracing around a spray paint lid) and then taped off the hourglass and painted it red. I would strongly recommend putting more coats of white paint down before painting the red hourglass, so the color will be more vivid. I painted it straight onto the black, and it’s just not as bright as I was hoping.

I used blue painter’s tape to mark off the hourglass. Mr Fangirl helped me sketch the basic shape onto the circle first.

It took multiple coats to get the red paint even, which is why I recommend white primer underneath.
And the finished buckle looks like this:

Voila!
Now… the tricky part. Attaching all of these circles to a belt. For SDCC purposes, I used a black leather belt that fit around my natural waist and just slipped these onto it by creating belt loops on the back of each circle:

I cut out rectangular strips of heavy felt and used superglue to attach them, slightly bowed outward, to the wood. To help the glue cure well, I used clothespins (with paper to protect the paint) to hold the ends of the felt in place.

As you can see, the loop is pretty tight. This helps keep it from sliding around on the belt while it’s around your waist.

And here is the finished product. Well, almost finished. I had it on a brown belt for testing purposes, and I used a black belt for the actual costume.
The number of circles you need depends on your waist size. Measure your waist, divide by 3, and make two or three extra circles over the number that you get. The circles can/will overlap a bit if you just slide them onto a belt like I did.
In the future, I think I’m going to find a way to actually attach the circles to the belt itself rather than sliding them on. That would help them stay evenly distributed around my waist and keep them from sliding entirely. But for a quick project, this worked really well.
The Whole Shebang
And here are some pics of the Work Wife in action! It’s admittedly a rather obscure version of the Widow, but it was a lot of fun watching it dawn on people that I was dressed up as a Hawkeye panel. A Marvel editor actually flagged me down to take a picture of me, which made my freaking month.
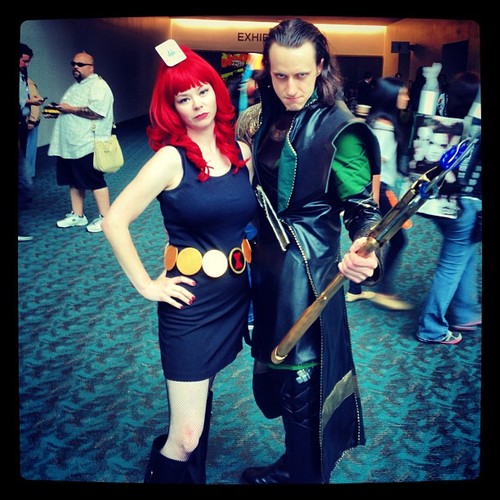
We called a temporary truce for Instagramming purposes.
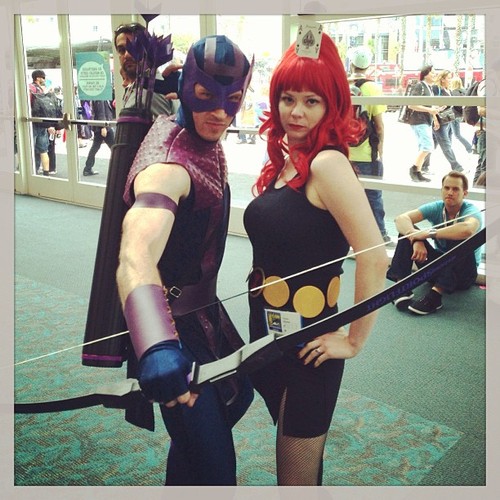
And I ran into a fabulous Hawkeye, who just had to pose with his Work Wife.
I’m definitely going to use this costume again for future conventions, and I had TONS of fun walking around in it. Also, we discovered that the bright red wig makes it easy for you to flag friends down at NerdHQ events.
So, what do you think? Would you do a Work Wife cosplay, or would you prefer a more traditional Black Widow for your costuming purposes?






Follow Us!